Are you ready to take your pup’s playtime to the next level with agility obstacles? Imagine the thrill of watching your furry friend conquer a challenging dog obstacle course, designed for agility trials, that you created yourself.
DIY dog obstacle courses, including contact obstacles, have become all the rage among pet owners of various breeds. These engaging courses offer endless fun for both you and your canine companion.
Creating a custom course tailored to your dog’s breed and abilities for agility trials is easier than you might think. With some PVC pipes, a few basic commands, and a dash of creativity, you can construct an exciting playground with agility obstacles for your pup right in your backyard.
The best part? You control the difficulty level, ensuring that every run is just challenging enough to keep them entertained. Plus, no special tools are required!
So why wait? Unleash your inner designer and get ready for hours of tail-wagging excitement with DIY dog agility obstacle courses. Your four-legged friend will thank you as they navigate jumps, tunnels, weave poles, and contact obstacles like a pro in agility trials.
Benefits of DIY Dog Agility Courses: Fun and Fitness for Your Pup
Improving your dog’s physical fitness through agility training is a great way to work on their breeds specific needs and provide mental stimulation. It can be challenging, but the difficulty level can be adjusted to suit your dog’s abilities. Dog agility courses are a fun and engaging way to bond with your furry friend while keeping them active.
Agility training involves teaching your dog to navigate various obstacles such as jumps, tunnels, weave poles, and A-frames. Different breeds may have varying difficulty levels when it comes to agility training. By incorporating these challenges into their routine, you can help improve their strength, endurance, and flexibility.
Certain tools may be required for agility training, such as jumps and weave poles. Having plans in place for your dog’s agility training can help ensure a structured and effective training program.
As they leap over hurdles or maneuver through tunnels, their muscles are engaged, contributing to better cardiovascular health and overall fitness.
In addition to the physical benefits, agility courses can help stimulate dogs’ mental abilities. Teaching new skills and commands during these courses requires focus and concentration.
The mental stimulation provided by agility courses can prevent boredom in dogs of all breeds, regardless of their difficulty level. This can also help prevent them from becoming restless or exhibiting destructive behavior. No specific tools are required for these courses.
As your dog progresses through the dog training agility course, you’ll notice improvements in their confidence, coordination, and agility.
Initially hesitant about certain obstacles during the dog walk, they will gradually gain the skills necessary to conquer each challenge with the appropriate difficulty level.
This newfound confidence will extend beyond the course itself and positively impact other areas of their life. If you need help with dog training, don’t hesitate to seek professional assistance.
Engaging in dog agility training offers an opportunity for socialization and building your pup’s social skills. Many enthusiasts participate in agility trials of varying difficulty levels, where dogs from different backgrounds come together to showcase their skills.
Interacting with other dogs in a controlled environment helps expose them to various personalities. No specific tools are required for this type of training, but you can find helpful guides on wikiHow for designing agility courses.
Moreover, DIY dog agility courses from WikiHow allow you to tailor the training experience specifically to your pet’s needs. You can modify the difficulty level according to their skillset and progress at a pace that suits them best.
This personalized approach, using the tools required and following design plans, ensures that both you and your furry friend enjoy the process while achieving desired results.
To get started on creating a DIY dog agility course, you can design your own plans by following the step-by-step instructions on WikiHow. The difficulty level of the course can be adjusted to suit your dog’s skill level and abilities.
- Determine available space and plans: Assess your backyard or any open area where you can set up the agility trials course. Consider factors such as size, surface, and safety, including the difficulty level of the dog walk.
- Design the layout: Sketch a rough plan of how you want the dog walk course to be arranged. Take into account the difficulty level of the obstacles you wish to include and their placement. Make sure to consider the license requirements as well.
- Gather materials: Collect the necessary materials for each obstacle, such as PVC pipes for jumps, tunnels made from fabric or plastic, and weave poles constructed from PVC or wooden dowels. These materials are essential for the design of the obstacles in our course.
- Introduce one obstacle at a time: Begin training your dog to navigate through the obstacle design. Use positive reinforcement techniques like treats and praise to encourage them.
- Gradually increase the design difficulty: As your pup becomes more comfortable with each obstacle, gradually increase the difficulty level by adding more challenges or increasing heights.
By engaging in DIY dog agility course design, you can provide your furry friend with an enjoyable way to stay active while strengthening your bond and stimulating their mind.
Step-by-Step Guide: Building Your Own DIY Dog Agility Course
Building your own DIY dog agility course can be a fun and rewarding project that allows you to provide mental and physical stimulation for your furry friend.
With our simple instructions, you can create an affordable and customizable course design right in your backyard. So let’s get started!
Start with Basic Equipment
To begin designing a dog agility setup, gather the basic equipment needed. This includes jumps, tunnels, and weave poles.
You can easily find these items at pet stores or online retailers specializing in dog agility equipment. Alternatively, you can make some of the equipment yourself using readily available materials.
For jumps, use PVC pipes or wooden dowels as the design frame and adjust the height according to your dog’s size and skill level.
Tunnels can be made from large plastic pipes or even old children’s play tunnels. Weave poles are typically made from PVC pipes arranged in a straight line with enough space for your dog to maneuver between them.
Adjust Difficulty Level
As your dog progresses in their training, it’s important to adjust the difficulty level of the obstacles to keep them challenged. For jumps, gradually increase the height or add more hurdles in succession.
Tunnels can be lengthened or twisted into different shapes to test your dog’s agility and flexibility. With weave poles , start with a few poles spaced far apart and gradually decrease the distance between them as your dog becomes more proficient.
Create a Safe Environment
When setting up your DIY agility course, consider design factors such as space, surface, and weather conditions to ensure a safe environment for both you and your pup. The version of the course will incorporate these considerations.
- Space: Make sure you have enough room for each obstacle without overcrowding the area.
- Surface: Opt for grassy areas or non-slip surfaces to prevent injuries caused by slipping.
- Weather Conditions: Avoid extreme heat or cold that may affect your dog’s performance or health.
Always supervise your dog during training sessions to ensure proper design and prevent accidents. It is important to provide immediate guidance when needed, as safety should be the top priority throughout the entire design process.
By following these step-by-step instructions, you can create a DIY dog agility course that will keep your furry friend entertained and mentally stimulated.
Not only will it provide physical exercise, but it will also strengthen the bond between you and your canine companion.
So gather your materials, get creative, and start building an exciting obstacle course for your four-legged friend that incorporates design elements.
Essential Equipment for Your DIY Dog Agility Course: A Comprehensive Checklist
Creating a DIY dog agility course can be an exciting and rewarding project for both you and your furry friend.
To ensure that your course design is safe, effective, and enjoyable, it’s important to have all the necessary equipment.
Here is a comprehensive checklist of essential items to consider when building your own dog obstacle course.
Ensure you have all the necessary equipment
Here are some key design items you’ll need:
- Jumps: These design obstacles help improve your dog’s jumping ability and coordination. You can use PVC pipes or adjustable jump bars to create different heights for the jumps.
- Design: Dogs love running through tunnels! Get a sturdy design tunnel made specifically for agility training or repurpose large tubes or barrels if they are safe for your pet.
- Design: Weave Poles: Weave poles challenge your dog’s weaving skills as they navigate through a series of upright design poles. You can make them using PVC pipes or purchase ready-made design sets.
- Pause Tables: These platforms provide a designated spot for your dog to pause during the course. They help teach control and obedience while giving them a break between activities.
Choose high-quality materials
To ensure the longevity of your DIY agility equipment, opt for high-quality design materials that can withstand regular use by active dogs. Consider using innovative design techniques.
- PVC pipes are perfect for designing a dog obstacle course. They are lightweight, durable, and easy to work with.
- Pressure-treated lumber is a great material for designing a dog obstacle course because it is resistant to rot and decay.
- Use heavy-duty fabric for the design of a dog obstacle course, ensuring that the tunnels are made with strong fabrics that won’t tear easily.
- Design a dog obstacle course with non-slip surfaces. Add rubberized coatings or grip tape on contact points like ramps or pause tables to prevent accidents.
Don’t forget safety measures
Safety should always be a top priority when designing an obstacle course for your furry friend. Take these precautions to create a safe environment:
- Design secure obstacles properly: Ensure that all equipment is stable and won’t tip over during your dog’s activities.
- Use non-slip design surfaces: Apply traction materials on ramps, pause tables, or any other slippery areas to prevent falls or injuries.
- Design the training area: Clear the course by removing any potential hazards such as sharp objects, toxic plants, or loose debris.
Consider additional items for effective training sessions
In addition to the essential design equipment, there are a few extra design items that can enhance your design training sessions. These include design tools and design software.
- Design treats: Use tasty rewards to motivate and reinforce positive behavior during training.
- Clickers: These small design devices make a distinct sound when pressed and can be used as a marker for desired behaviors.
- Leashes: Design different types of leashes available for various exercises and levels of control.
- Design: Use timers to track your dog’s progress and set goals for improvement in design.
By having all the necessary equipment for dog agility design, using high-quality materials, implementing safety measures, and considering additional tools like treats, clickers, leashes, and timers, you’ll be well-prepared to create an engaging DIY dog agility course.
So gather your supplies and get ready for some fun-filled training sessions with your canine companion!
Homemade Obstacles: Creative Ideas and Inspiration for Your Dog Agility Course
Are you looking to design a fun and engaging obstacle course for your furry friend? Look no further!
From designing balance beams made from wooden planks or logs to repurposing household items like hula hoops or pool noodles, there are endless possibilities to create budget-friendly agility equipment right at home.
Explore Unique Homemade Obstacles
One of the great things about DIY dog obstacle courses is the ability to get creative with different design obstacles. For example, you can construct a balance beam using sturdy wooden planks or logs.
This design obstacle will test your dog’s coordination and balance as they navigate across it. It’s a simple yet effective way to enhance their agility skills.
Repurpose Household Items
Don’t underestimate the power of repurposing everyday items for your dog’s agility course design.
Hula hoops and pool noodles can be transformed into play tunnels or contact obstacles.
Simply arrange them in an enticing formation, and watch as your pup zips through them with enthusiasm.
Not only is this a cost-effective solution, but it also adds variety to their training routine.
Embrace Natural Elements
If you have access to outdoor space, why not incorporate natural elements into your dog’s obstacle course design?
Fallen branches or tree stumps can serve as hurdles or stepping stones for them to jump over or maneuver around.
This not only adds an authentic feel but also provides mental stimulation as they adapt to different terrains.
Get Inspired by DIY Tutorials
The internet is a treasure trove of DIY tutorials and videos that can inspire you in creating custom obstacles tailored specifically for your dog’s abilities. From building ramps using old PVC pipes to constructing weave poles out of inexpensive materials, these resources offer step-by-step instructions that make the process easy and enjoyable.
As you embark on your DIY adventure, keep in mind that safety should always be a top priority. Ensure that the materials you use are sturdy and secure to prevent any accidents or injuries. Consider your dog’s size, age, and physical capabilities when designing the obstacles. It’s important to strike a balance between challenge and feasibility.
Tire Jump Tutorial: Building and Training with the Perfect Tire Jump
Building your own dog obstacle course can be a rewarding and fun project. One of the essential agility obstacles is the tire jump, which challenges your furry friend to leap through a suspended hoop.
In this tutorial, we will guide you through the process of constructing a tire jump using PVC pipes and a sturdy hoop. We’ll provide step-by-step instructions on how to train your dog to jump through the tire safely and confidently.
Constructing a Tire Jump
To begin building your DIY tire jump, gather the following materials:
- PVC pipes (quantity based on desired height and width)
- Connectors for PVC pipes
- A sturdy hoop (such as a hula hoop or wooden frame)
- Measuring tape
- Saw or pipe cutter
- Zip ties or rope
- Determine the desired height and width of your tire jump based on your dog’s size and skill level.
- Measure and cut the PVC pipes according to your desired dimensions.
- Assemble the PVC pipes using connectors to create a rectangular frame.
- Attach the sturdy hoop at an appropriate height within the frame using zip ties or rope.
- Ensure that all connections are secure and stable.
Congratulations! You have successfully constructed your very own tire jump for your dog’s agility training.
Training Your Dog to Jump Through the Tire
Now that you have built your tire jump, it’s time to train your pup to navigate this exciting obstacle safely. Follow these step-by-step instructions:
- Introduce your dog to the tire jump by allowing them to explore it without any pressure.
- Use treats or toys as incentives to encourage your dog to approach and interact with the tire jump willingly.
- Begin by teaching basic commands like “jump” or “through” while guiding them towards jumping through the hoop.
- Gradually increase their confidence by raising the height of the tire jump in small increments.
- Reward your dog with praise and treats each time they successfully jump through the hoop.
- Practice regularly to reinforce their training and improve their agility.
Adjusting the Height for Your Dog
It’s important to adjust the height of the tire jump according to your dog’s size and skill level. Here are some tips:
- For smaller dogs or beginners, start with a lower height to build confidence before gradually increasing it.
- Larger or more experienced dogs can handle higher jumps, providing an additional challenge for them.
- Always prioritize safety by ensuring that the hoop is at a comfortable height for your dog to clear without any risk of injury.
Mastering Training Techniques
To effectively train your dog on the tire jump, consider using targeting or luring techniques:
- Targeting: Teach your dog to touch a specific target (such as a stick or target mat) placed on one side of the hoop. Gradually move it closer to the center until they confidently jump through.
- Luring: Use treats or toys to guide your dog through the hoop. Start by holding it just above and in front of the hoop, gradually raising it higher until they leap through.
Celebrate their progress along the way and enjoy watching them conquer new challenges on their DIY obstacle course!
Planning Your DIY Dog Agility Course: Detailed Plans and Layout Suggestions:
Careful planning is essential to ensure an engaging and challenging experience for your furry friend.
Plan the layout of your course considering factors such as space, terrain, and accessibility.
Before diving into the construction phase, it’s crucial to assess the available space in your backyard or any other area where you plan to set up the agility course. Consider both the length and width of the space, ensuring that it offers enough room for various obstacles without feeling cramped. Take note of any natural features like slopes or trees that could enhance or hinder certain elements of your course.
To make the most of your available space, try incorporating vertical challenges such as jumps or weave poles alongside ground-level obstacles like tunnels or A-frames. This way, you can utilize different dimensions while keeping everything within a manageable size range. Remember that dogs need ample room to maneuver comfortably between obstacles.
Accessibility is another crucial aspect to keep in mind during planning. Ensure there is enough clearance around each obstacle so that both you and your dog can move freely without any obstructions. This will not only enhance safety but also allow for smooth transitions between challenges.
Optimize flow by strategically placing obstacles in a logical sequence for smooth transitions.
To create a seamless experience for both you and your dog, strategically arrange obstacles in a logical sequence that promotes smooth transitions from one challenge to another.
Start with simpler tasks at the beginning of the course and gradually increase the difficulty towards the end.
Consider grouping similar obstacles together; for example, place all jumping hurdles in one section while setting up tunnels in another area.
This way, dogs can easily understand what is expected from them as they progress through the course. By optimizing flow, you can maintain momentum and keep your dog engaged throughout the entire run.
Incorporate variety into your course design with different types of challenges at varying difficulty levels.
A well-designed dog agility course offers a mix of obstacles that test various skills and abilities. Introduce a range of challenges to keep your dog mentally stimulated and physically active. Here are some ideas for incorporating variety into your course:
- Jumps: Set up hurdles at different heights to encourage jumping skills.
- Tunnels: Include both straight and curved tunnels to challenge agility and navigation.
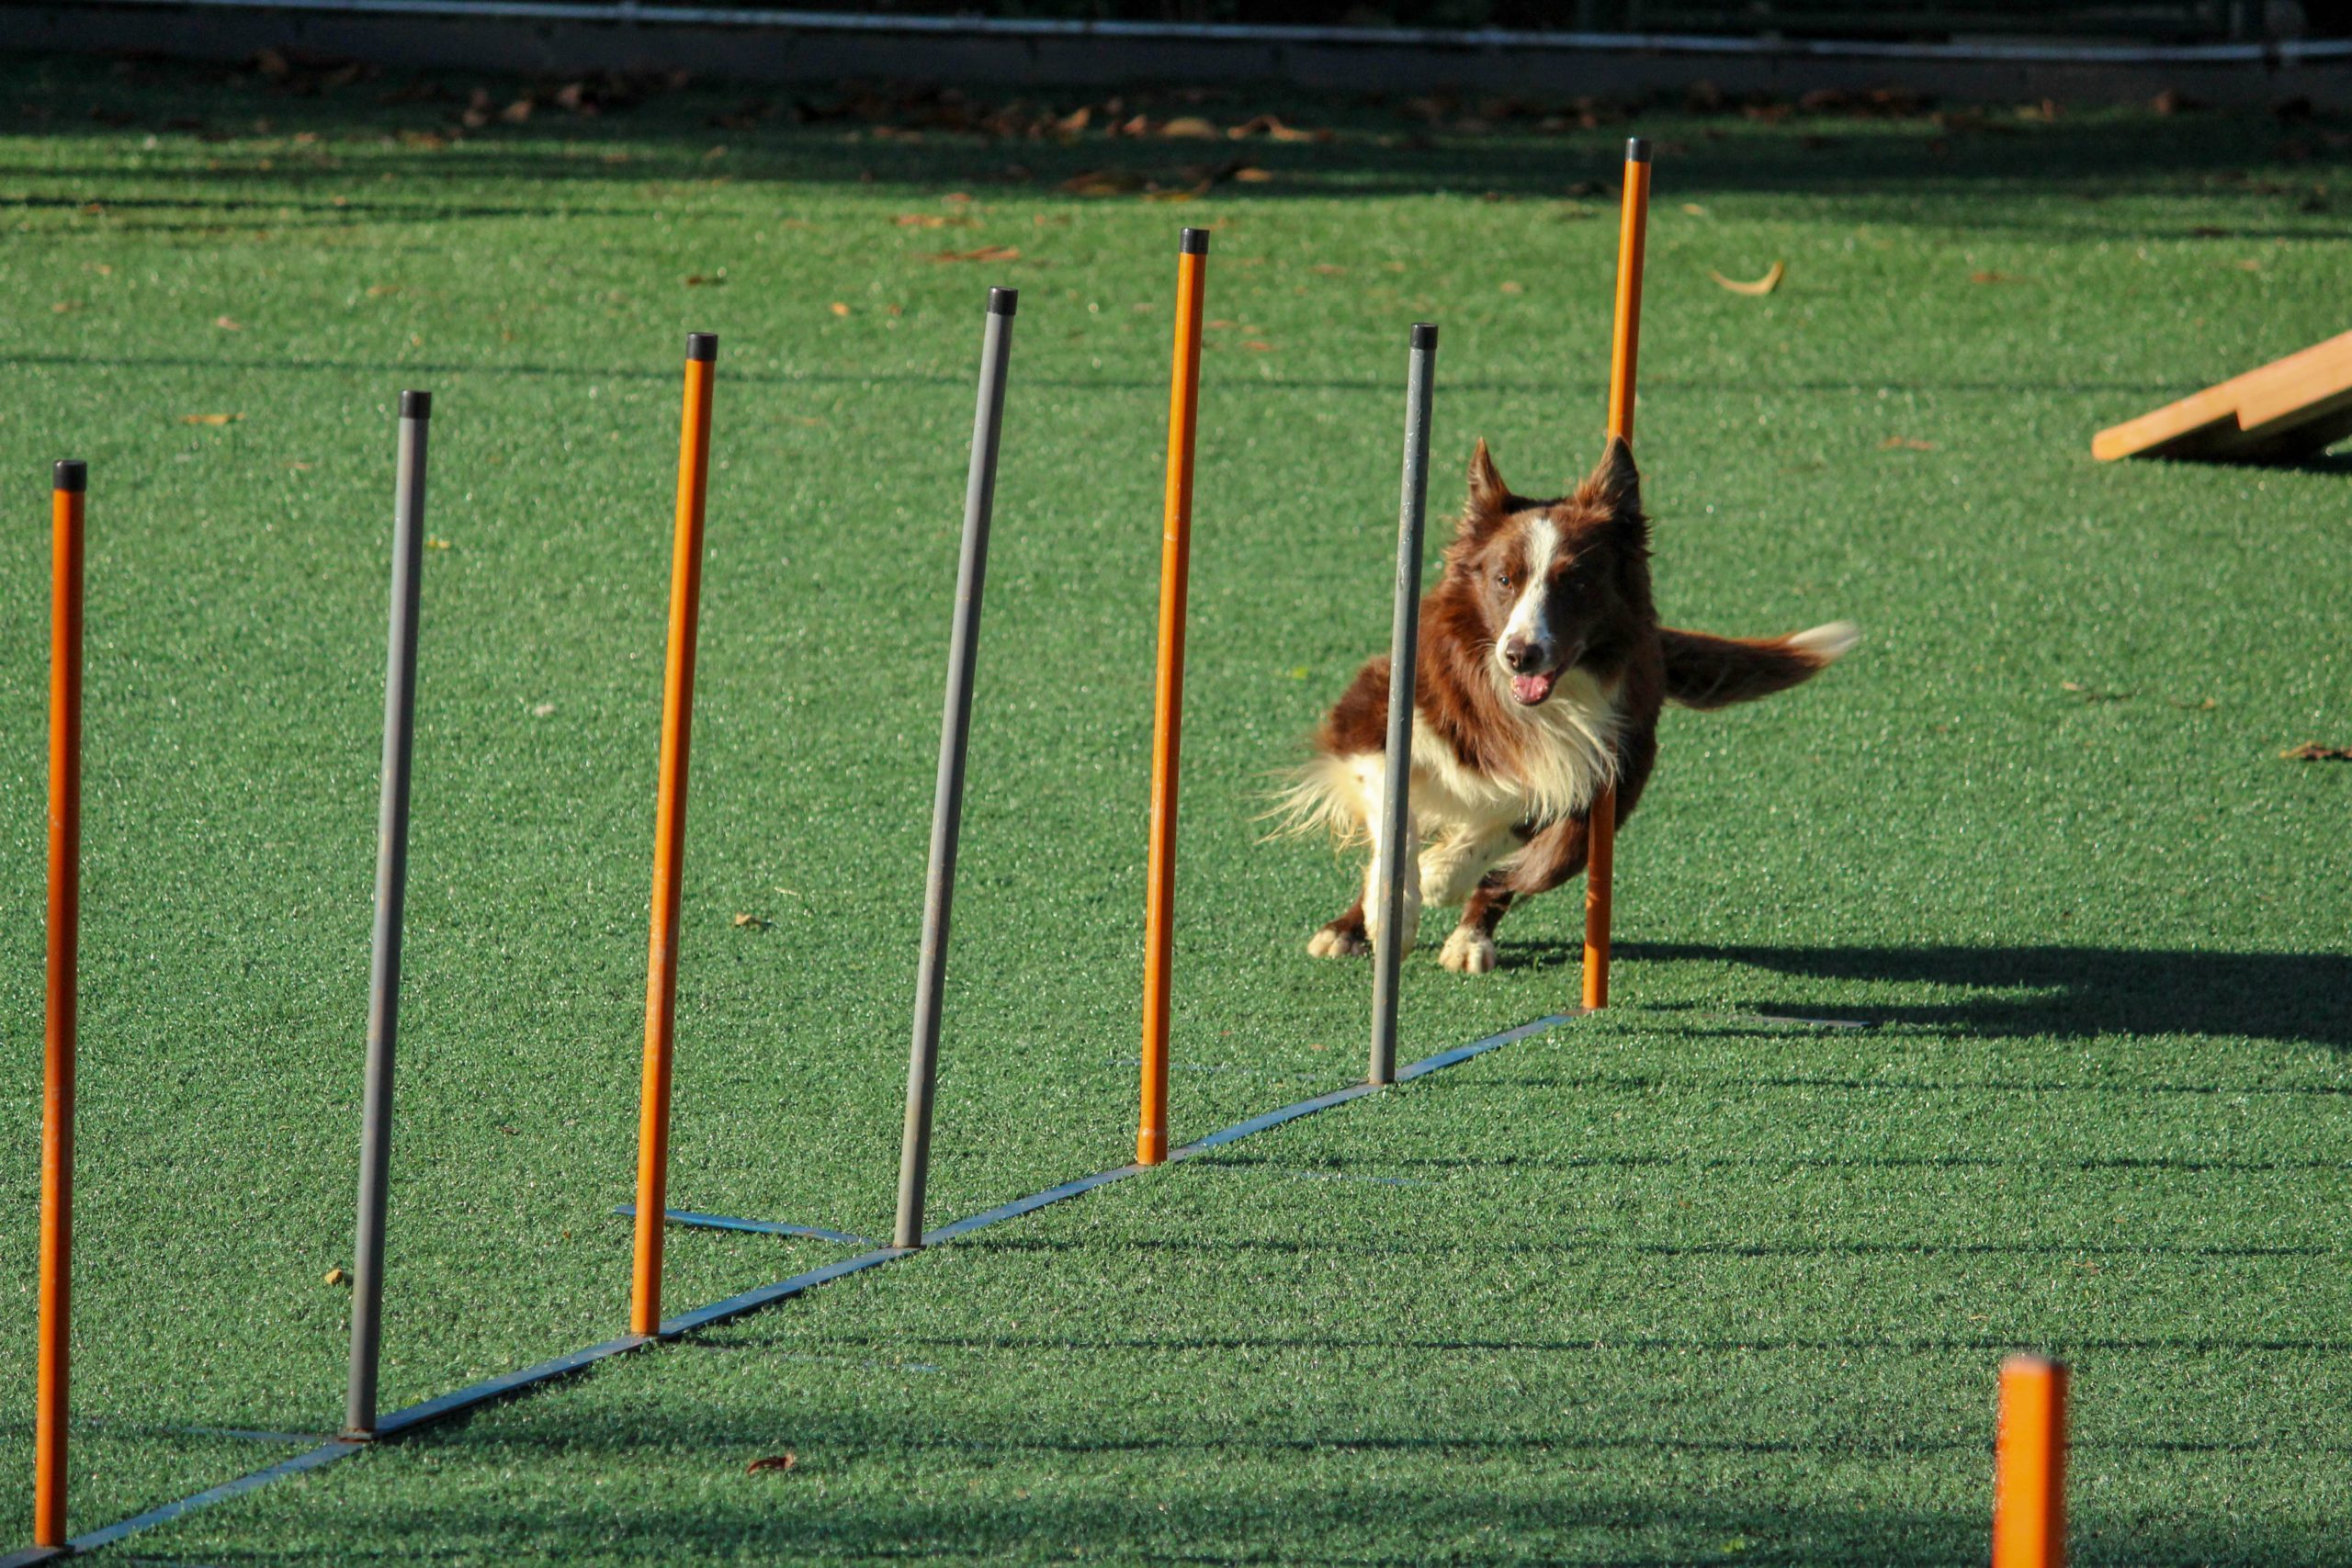
- Weave Poles: Arrange poles in a weaving pattern for dogs to practice their agility skills.
- A-Frame or Dog Walk: Construct an inclined platform for dogs to ascend and descend, testing balance and coordination.
- Pause Table: Create a designated spot where dogs must pause before proceeding, enhancing focus and control.
By offering diverse obstacles, you can cater to dogs of all skill levels, from beginners to more experienced athletes. This ensures that every training session on the DIY obstacle course is engaging, challenging, and rewarding.
Take inspiration from sample layouts provided to create an engaging course tailored to your dog’s needs.
If you’re unsure where to start or need some inspiration for your DIY dog obstacle course layout, there are plenty of sample plans available online.
These layouts provide visual representations of how different obstacles can be arranged within a given space.
Wrapping Up: Enjoying the Rewards of a DIY Dog Agility Course:
Congratulations! By building your own DIY dog agility course, you have taken a proactive step towards providing fun and fitness for your furry friend. Let’s quickly recap the key points we covered throughout this guide.
Firstly, we discussed the benefits of DIY dog agility courses. Not only do they provide entertainment for your pup, but they also promote physical exercise and mental stimulation. It’s a win-win situation!
Next, we provided you with a step-by-step guide on how to build your own DIY dog agility course. From choosing the right location to assembling various obstacles, we walked you through the process, ensuring that you have all the necessary information to get started.
We then delved into essential equipment for your DIY dog agility course. Our comprehensive checklist ensured that you wouldn’t miss anything while setting up your course. Remember, safety should always be a top priority when designing and constructing obstacles.
To fuel your creativity, we shared some homemade obstacle ideas and inspiration for your dog agility course. Whether it’s repurposing household items or getting crafty with materials, there are endless possibilities to make unique and engaging challenges for your pup.
We provided a detailed tutorial on building and training with a tire jump—an essential component of any dog agility course. With our guidance, you’ll be able to construct the perfect tire jump and teach your furry companion how to navigate it like a pro.
Lastly, we emphasized the importance of planning. We offered detailed plans and layout suggestions to help optimize space and ensure smooth transitions between obstacles.
Now that you have all this valuable information at hand, it’s time to put it into action! Grab those tools and start building an exciting playground for your four-legged buddy today. Get ready to witness their enthusiasm as they conquer each obstacle with joy!
Remember that practice makes perfect, so be patient and consistent in training your dog on the course. Enjoy the rewarding journey of bonding with your furry friend while watching them grow stronger, more confident, and more agile.
So what are you waiting for? Unleash your creativity and embark on this exciting DIY project that will bring endless hours of enjoyment for both you and your pup!
FAQs:
Q: How long does it take to build a DIY dog agility course?
Building a DIY dog agility course can vary in time depending on factors such as the complexity of the obstacles, available materials, and personal skill level. However, with proper planning and dedication, you can expect to complete it within a few days or weeks.
Q: Can I modify the obstacle designs to suit my dog’s abilities?
Absolutely! One of the advantages of building your own DIY dog agility course is customization. You have the freedom to adjust obstacle heights, distances, or even create new ones tailored specifically for your dog’s abilities.
Q: Are there any safety precautions I should consider when using a DIY dog agility course?
Safety should always be a priority when using a DIY dog agility course. Ensure that all equipment is sturdy and secure before allowing your pup to use it. Regularly inspect the course for any signs of wear or damage that may pose a risk. Consult with your veterinarian to ensure that your furry friend is physically fit for agility training.
Q: Can older dogs benefit from using a DIY dog agility course?
While younger dogs may naturally excel at agility courses, older dogs can also benefit from using them. It’s important to tailor the intensity and difficulty level of the obstacles according to their age and physical capabilities. Always consult with your veterinarian before starting any new exercise regimen.
Q: Can I participate in competitions with my dog after building a DIY agility course?
Yes! Once you’ve trained your pup on your homemade agility course, you may choose to participate in local dog agility competitions. These events provide a great opportunity to showcase your dog’s skills and bond even further with them. Just remember to check the specific competition rules and regulations beforehand.
Q: How can I make the training sessions on my DIY dog agility course more enjoyable for my dog?
To make training sessions more enjoyable, incorporate positive reinforcement techniques such as treats, praise, or playtime after successfully completing an obstacle. Keep the sessions short and fun to maintain your pup’s interest and enthusiasm.